The Aplos team invited me to put up an R-Language API code demo so that it can be shared with others that might want to interface to the Aplos API on their own.
It’s here https://github.com/KenWade/AplosAPI-R
I hope it’s helpful…
Big Data, Justice, Research
The Aplos team invited me to put up an R-Language API code demo so that it can be shared with others that might want to interface to the Aplos API on their own.
It’s here https://github.com/KenWade/AplosAPI-R
I hope it’s helpful…
Description

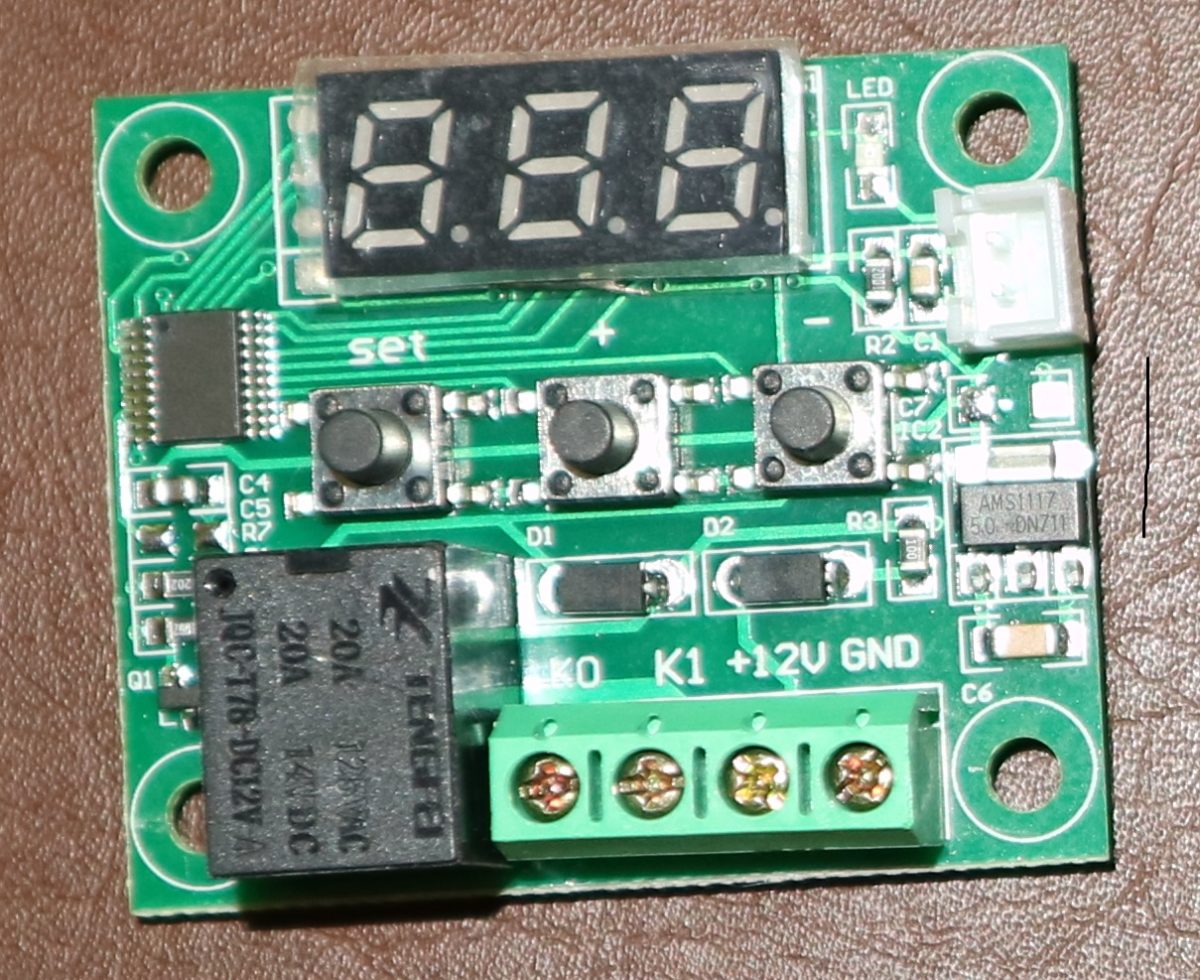
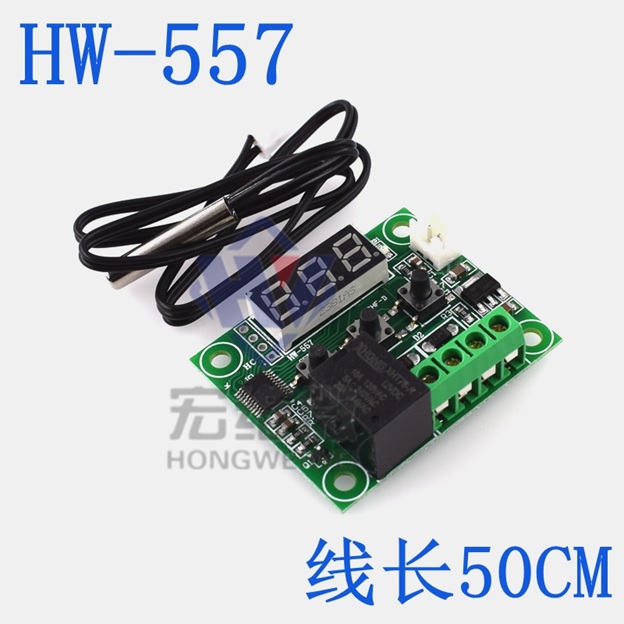
The HPC09 Head Pressure Control Optimized Temperature Control Switch is a W1209 Temperature Control Switch reprogrammed with advanced software to specifically designed to optimize HVAC control systems. The HPC09 focuses on controlling system temperature understanding real-world HVAC designs and performance optimization strategies.
Specification
HPC09 Head Pressure Control Algorithm
The HPC09 algorithm combines two algorithmic strategies, and other advanced features, to optimize Head Pressure Control in real-world HVAC systems.
Separate digital process control of low and high temperature setpoints.
Rather than being a simple, single-temperature, stable-limit-cycle style thermostat the HPC09 implements two separate digital process control algorithms to operate the HVAC between specified low-temperature and high-temperature setpoints. As the two separate control algorithms maintain the HVAC temperature system between specified set point temperatures the system’s head pressure remains bounded and optimized.
Cycle time management.
Changing environmental loads change an HVAC system’s cycle times. As the environmental load increases the system’s cycle time increases. This association is so reliable that with practice outside temperature can often be inferred from an HVAC system’s cycle time. As cycle times increase there is an opportunity to tighten the system’s low and high temperature setpoints. Tightening the temperature setpoints has multiple positive outcomes; less temperature swings, less head pressure swing, and system operation consistently closer to optimum parameters. These outcomes work together to increase comfort and save operational costs.
As the environmental load and system’s cycle time decreases. HVAC systems can become overpowered to the point where operational efficiency must give way to other issues such as motor protection. Increasing the spread of the low and high temperature setpoints increases cycle time.
Motor protection.
Additionally, the HPC09 algorithm implements an anti-jogging safety timer to be sure that the output relay does not switch faster than the time selected. The decimal point of the left-most seven-segment-display digit will be lit when the anti-jogging safety timer is active.
Quickset pushbuttons.
Fine tuning the HPC09 algorithms requires multiple parameter settings. To simplify quick and simple operation of the HPC09 a Quickset interface has been implemented. Quickset operation looks something like the original W1209 temperature setting method yet fully sets all the parameters needed to operate both the low and high temperature setpoints and the cycle time management algorithms. Low and high temperature setpoints are -/+ 6 degrees of the selected temperature. Cycle time parameters are set to default values to implement constant temperature setpoints at all cycle times.
If you have read this far you might be interested in the HVAC Test Load Simulator used to test and fine-tune the multiple control algorithms in this project.
A really old post showing early thinking about the project is
Cell Phone Tower Machine Room Advanced Temperature Control Unit.
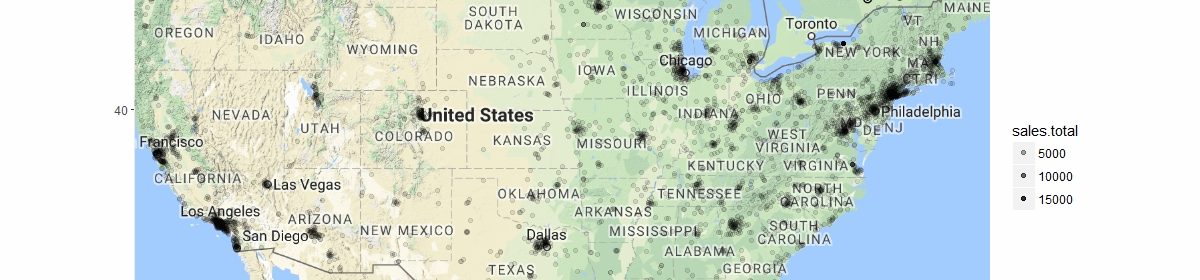
The process of moving accounting data thru the LittleGreenLight and Cedarstone Reporting System to Aplos is pretty amazing. These back-office partners consolidate all the donations from multiple credit card companies, multiple ACH sources, multiple EFT sources, and old fashion checks. Additionally, one-off donations from other sources come in on a rare, but regular basis.
The big trick is to process the input donation information into standard donation “sets” that include the donation, the donation processing fee, and the credit card fee (if the donation was made by credit card). This means that each donation set will be made of either two or three journal entries, each of which is made of four components (as opposed to two components for double-entry booking).
These journal entries are in a standardized format so that all sorts of quality checks can be automated down the line. For example, duplicate journal entries can be detected (which was an Aplos user interface problem for about a year) and accidentally changed or deleted journal entries can be detected. Of course, there are all sorts of other accounting errors that can crop up but having the ability to check for a consistent input is important.
From all the input sources, and considering the standardized format, the two Aplos donation input files are created. The Aplos Journal Import file and the Aplos Input Contribution files are in totally different formats and imported into Aplos in totally different ways.
The Shiny R-Language applications are starting to look alike but the internals are highly conserved so that is not a surprise.
In older posts I had links to try the different Shiny R-Language software out. Those applications were simple file converters. It’s probably not a good idea to do that anymore.
After over a year of development and iterating with everyone it is time to share the Shiny R-Language application that makes Aplos useful to everyone, no matter how accounting savvy they are.
Aplos is an amazing tool but it is complicated. Just moving everyone up to the complexities of Fund Accounting is a huge jump. Getting everyone to understand the complex, yet limited, Aplos reports was too much. So, a simplified, integrated tool was needed.
The “Aplos Details” tool does a couple things; the most important is that it reduces the fund accounting world to checkbook-like report – a simple list of transactions by date with a running balance. What a difference this has made!
The next most important thing this tool does is give all the users access to their contacts. Aplos exposes all contacts to all accounts to everyone all the time. This is obviously not proper, and perhaps not legal. Therefore, the “Aplos Details” tool is vital for users anywhere data sharing laws or standards are in force. Without the tool there is no way that users could get access to their donor information.
Finally, the tool combines contact and transaction information to produce an old-style report that shows donor giving information over time to allow everyone to see how a donor has given in the past. This report has been part of typical donor management tools for decades. It’s a bit of a mystery why Aplos doesn’t include this as a standard report .
Additionally, the “Aplos Details” tool has some administrative features built in that allows us administrators to manage donation “sets” rather than individual Aplos transactions. This is really helpful when notes have to be added to the record or donation sets moved between funds. Further, managing donation sets allows the tool to run several quality assurance tests on the financial database ensuring simple mistakes are not made accidentally.
Behind the scenes this application uses just about everything we can get out of Aplos. API’s are interrogated, standard Aplos reports are digested, uploaded, downloaded, and converted to and from XLSX files, and our accounting information is combined in useful ways that Aplos never envisioned.
To build the Head Pressure Control Optimized Temperature Control Switch (that is being prototyped as an Arduino Sketch and be fully implemented as a re-flashed W1209 device) an HVAC Test Load Simulator needs to be built.
Update:The in-process re-flashed device project has been named the HPC09 Head Pressure Control Optimized Temperature Control Switch. Take a look
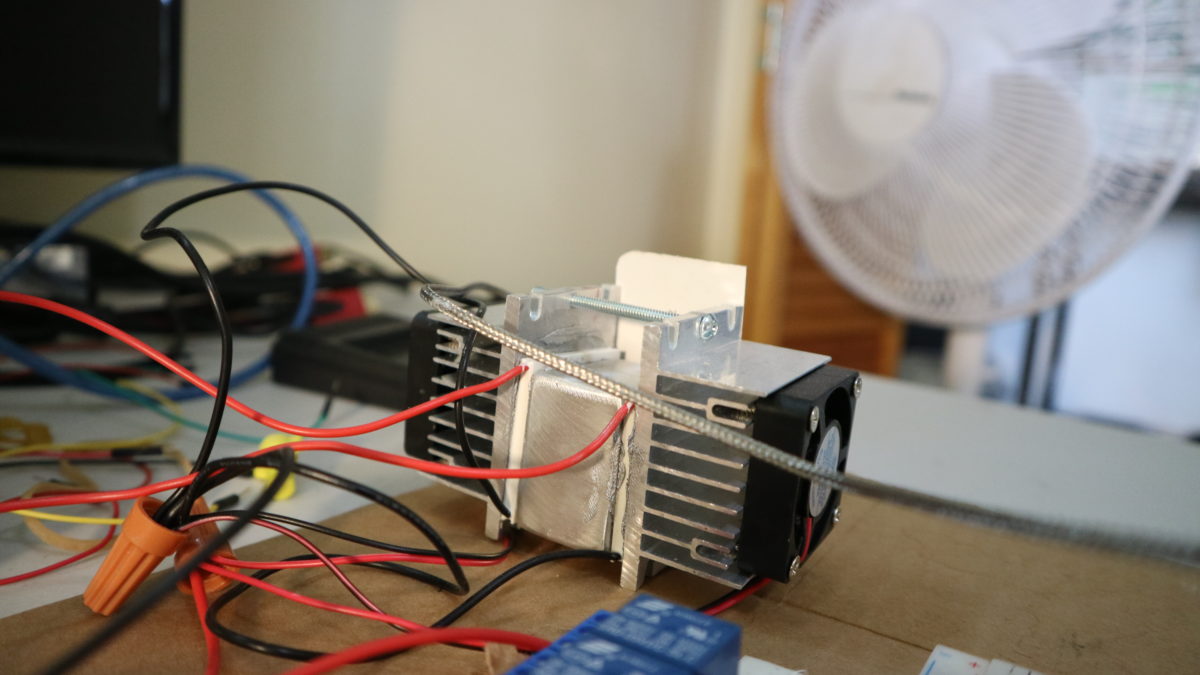
My idea is to take a block of aluminum and put an independently-controlled thermoelectric Peltier effect heater/cooler and fan on each side to heat and cool the block.
A local machine shop cut the block and drilled a hole in the side to accommodate the thermistor probe. The Peltier devices are placed on each end in such a way that heat is pumped into one side of the block and pulled out the other. Notice how both the Peltier devices are oriented the same way so that heat always moves in one direction thru the simulator.
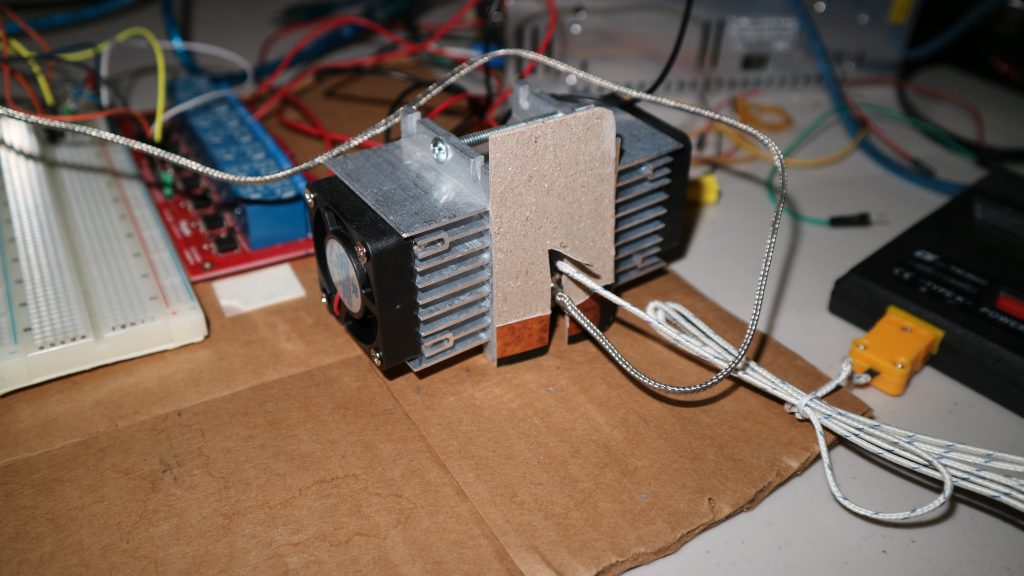
The cardboard shield needed to be added because the probes were being blown by the fans and didn’t represent the temperature of the block.
The bank of TTL-controlled relays provide independent power to the fans
Peltier devices. In the end, the best HVAC simulation was achieved by running the fans full-time and turning the appropriate Peltier device on and off as needed.
By providing both heating and cooling signals any pair of temperature setpoints can be achieved. Running a single Peltier device allows chilled-to-room-temperature or room-temperature-to-warm scenarios.

The Arduino Sketch code, the little breadboard, and the relays are working well. The biggest problem has been the thermal grease – it seems to get everywhere…
Thermoelectric Peltier Device Air Conditioning Equipment Simulator – is the initial, old post about the same topic.
The last couple months have been focused on building tools to make the Aplos Fund Accounting software do a couple basic things that it is simply not designed to do.
It’s funny, three simple expectations that have been around since the inception of computerized accounting are glossed over in the design of the Aplos system. It’s not that these three things are “broken” or “not implemented well”. They are not even conceptually part of the Aplos world. Really, it’s a basic attitude thing.
Aplos is a much better solution for our growing administrative function than what we had before so there is no serious talk of going back. Aplos is good stuff, but as an older engineer, I’m rather surprised by how many of the hard-won lessons of the past have simply been ignored by the young ones building the Aplos system. Also, I’m surprised that such a progressive shop can actually believe they have accounting figured out for the entire world for all time. That a bit scary as I write that down…
Welcome to the 80’s!
Time to build our own software to get our data back.
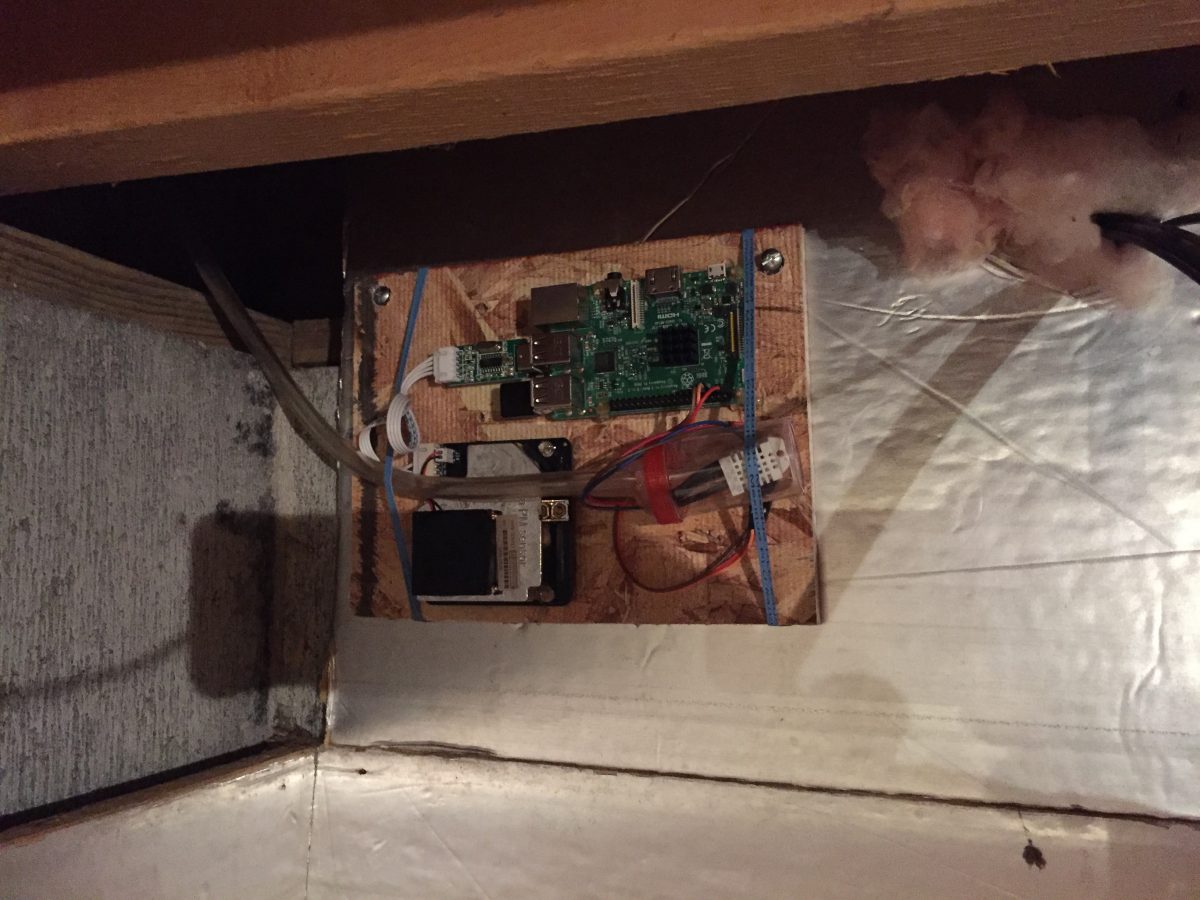
Link to original post: Laser PM2.5 Sensor–SDS011 – Build
We’ve been having crystal-clear weather for months and the pollution monitor here at the house has been logging almost flat-line, crystal-clear pollution data.
However, this afternoon, a neighbor started to burn some brush and it got away from him a bit. The resulting smoke filled the air.
I opened up the website https://aq.ajosoft.com/index.php?StationID=2166&Country=USA&sort=0&units=0 to see the current PM2.5 and PM10 readings and something was wrong! Still flat-line, crystal-clear readings. Time for some debugging…

First thing was to go down and look at the project board. Everything looked good. However, inspection of the outside plumbing tube clearly showed an insect cocoon of some sort plugging the input air tube.
My bright idea was to blow the tube clear. I huffed and puffed into the tube and nothing happened. I sucked and nothing happened. I tried alternating blowing and sucking and nothing happened. In desperation I tried one more really hard blow and the cocoon broke free and I cleared the line.
I wish I would have taken a photo. The plastic jar with the DHT22 humidity sensor did exactly what it was supposed to do (besides give air plumbing room for the sensor itself) – it caught the cocoon.
ONLY IT WASN’T NICE NEAT COCOON – it was a cocoon containing about 100 GROSS TINY WORMS. I’m so glad it didn’t break free when I was trying to suck the tube clear as they would ended up in my mouth!!!
Anyway, pollution data is accurate again. The numbers are moving as expected, still clean air but not quite so flat-line.
Link to original post: Laser PM2.5 Sensor–SDS011 – Build
The next step in the process is to add the credit card fees that need to be charged to each donation. These charges are accessible in the QuickBooks Journal Report.
The QuickBooks Journal Report is an MS Excel spreadsheet that is nice for human consumption. But, there does not seem to be any QuickBooks provision for getting a nice clean machine-readable format so we work with what we have.
So, the real work of this “module” is building a QuickBooks Journal Report decoder. The rest of this application has already been built and is simply being reused. In fact, the human interface is starting to become a bit standard…
The workflow is pretty much the same as well…
Here is the link to the “R” Language Shiny Webpage that runs the application. Feel free to give it a try – of course you will need data so send me a note if you are interested.
Continuing to build up the accounting data set it is now time to start to move donation data to Aplos in real-time.
As a bit of an aside, we contract with a company to handle our front-end donation processing. They work with another company that has a very old-fashioned donation management system called LGL. While it may be old-fashioned it works and we don’t think we can change accounting and donation management at the same time. This isn’t going to be easy but we’re going to have to run with the existing donation management system and use automation to enter donation data into the Aplos system.
In the future I envision this to be the bread-and-butter application for our front-end contractor. This application starts the process of learning how to do this task well.
Here is the link to the “R” Language Shiny Webpage that runs the application. Feel free to give it a try – of course you will need data so send me a note if you are interested.
The next big task is getting all the QuickBooks Checkbook entries entered into the Aplos system.
This is very similar to calculating the Cord Ministries Fees from the Aplos “Detailed Donations by Contact” Report except that this time the data source is the QuickBooks Checkbook output file.
Here is the link to the “R” Language Shiny Webpage that runs the application. Feel free to give it a try – of course you will need data so send me a note if you are interested.